Sunday, April 29, 2012

Inkblot Dress DIY Tutorial

There are so many Project Runway garments that have inspired me through the years, but Mondo's Rorschach dress really captivated me and made me want to attempt something similar.  This was also the perfect opportunity to play around with making my own print.


See tutorial after the jump.

Wednesday, April 11, 2012

Nautical (DIY) + Gingham + Bright Accessories

Remember this Pinterest image I repinned from Aubrey?  I tried it with the dotted skirt but the proportions didn't look right on me so I decided to try it with a slimmer skirt.  I tied the ends of the shirt to make it look more feminine (and outright copied Cee).

J. Crew Crewcuts Boys' Gingham Shirt
DIY Nautical Kasia Skirt
Amrita Singh Water Mill Necklace, Coral (buy here)
Timex Watch + J. Crew Strap
Orange Horsebit Bracelet & H&M Enamel Bangle
Talbots Suede Chunky Heel City Sandals

This skirt is a previous DIY using Burdastyle's Kasia:

 
I love that this pattern incorporates buttons and hip ruching to set it apart from other pencil skirts.

I don't have any orange heels so threw in some yellow ones - should I have gone with neutral colored shoe instead?

Sunday, April 8, 2012

Paisley Fit and Flare Dress DIY

I still have paisley on the brain and found this cotton quilting fabric at Joann's.  This particular print isn't what I had in mind as my holy grail paisley, but I do like it.  I decided to "Frankenstein" some patterns together to get this particular look with a high funnel neck, fitted bodice and flared skirt.

Paisley Dress DIY
Melie Bianco Bag
Old Navy Tassel Necklace
Gucci d'Orsay Pumps, Camel
Do you think a necklace can be worn with a funnel neckline?

Close-up of print

Hope everyone had a great weekend!

If you haven't already, there's about a week left to enter my Nautical Bracelet Giveaway :)

Wednesday, April 4, 2012

DIY Nautical Rope Bracelet Tutorial

UPDATE:  These are now available in my Etsy store if you'd prefer to buy than DIY :)

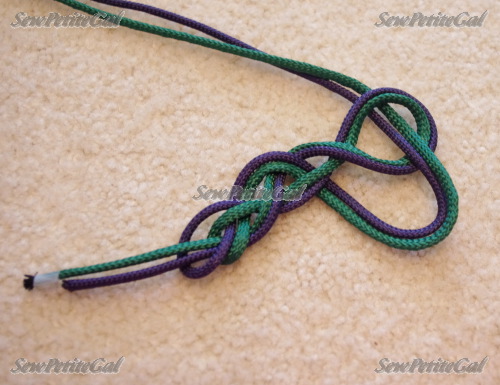
I know you're thinking, "duh, I know how to braid, why are you doing this tutorial?"  This actually uses a similar method to creating a Turk's head knot which results in a cleaner looking braid that does not require 3 strands.  In fact, you can use a single strand if you wish.


What I used:
~24 inches of blue and green ropes (purchased in trim section of fabric store)
Glue
Jewelry pliers
2 jump rings
2 cord ends
1 lobster clasp
Scissors 

Leaving a few inches at one end, make a loop

Bring the long end up through the loop

Create a figure 8 with the loop.
For a longer braid, make a larger loop and more figure 8s.

Thread long end through the 1st portion of the figure 8

Thread long end through the 2nd portion of the figure 8

What it should look like after all threading

Lightly pull at both ends to tighten the braid.  Arrange strands by tightening / loosening to get desired look.

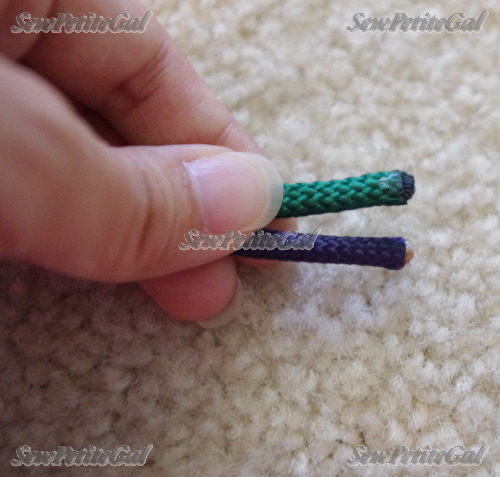
Snip rope ends to desired length.  Add clear glue to ends so rope doesn't unravel.

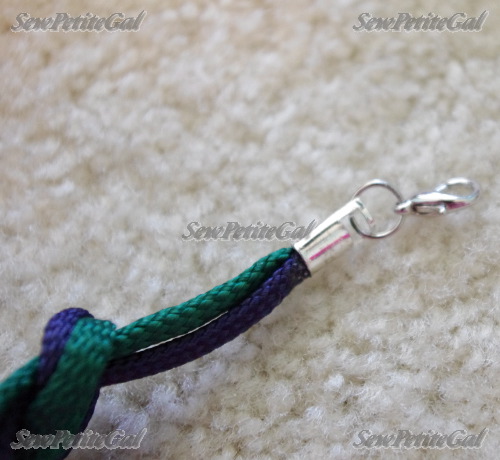
Dab glue in cord end and insert rope ends.  Let dry.  Do this for each side.

Use pliers to fold the cord ends together enclosing the ropes.  Add jump ring.

Do the same thing with the other end but also add your lobster clasp.  

That's it!

For different variations, add more colors / ropes or change the closures as you'd like.

DIY Nautical Rope Bracelet (buy here from Etsy)
Timex + J. Crew Strap
DIY Nautical Wrap Bracelet

LinkWithin

Related Posts Plugin for WordPress, Blogger...